Tuesday, 19 April 2011

Corazanes Dulces

Corazanes Dulces, translates to "Sweet Croissants". However these little yummy morsels, are not a lot like croissants, except for their shape. These "croissants" are a lot more bready in texture. In Uruguay these are a part of a group of sweets we call "Bizcochos" and we usually eat them for afternoon tea with a nice "mate".

This is what bizcochos look like.
http://cocinerama.com/wp-content/uploads/2008/09/bizcochos.jpg

I have never tried to make these before, but for some reason, a couple of weeks ago, I went in search of a recipe. They are normally made using lard, from beef or pork, but being vegetarian, I had to vary the recipe to use a non animal fat.

Follow this link for the recipe that I used. The recipe is in Spanish, but the ingredients for the original are as follows:

Dough
500 grams plain flour
30 grams fresh yeast
30 grams sugar
30 grams salt
150 grams lard (pork or beef, at room temperature)
200 mls warm water

Paste
70gms lard
100gms plain flour

I thought that 30grams of salt was far too much, and reduced the amount to 10gms. Also when I went to start, I realised that I didn't have enough plain flour, so I used a combination of spelt and plain flour. Also, I found that the "PASTE" which is meant to be made with the 70gms of lard and 100gms of plain flour, turned out like a dough, I guess it must be because the fat that I used had a high content of water, and therefore didn't perform like the lard. Still, I got some good results :)

I also varied the recipe by using a bread maker instead of doing it all by hand. It works well this way when you have a 3 month old baby at home ;)

These are the ingredients for the ones that I made.
Dough


250gms plain organic flour
250gms organic spelt flour (white)
150gms butterfully light (it's a butter/oil spread from Aldi, I didn't realise it was low fat till later)
2tsp dry yeast
30gms sugar
10gms salt
200mls warm water

Paste
70gms melted butterfully
100gms spelt flour
In addition to this I also used 2 tbs of butterfully and 2tbs of spelt flour.

Method
  1. Place all the dough ingredients in the bowl of your bread maker and turn on to the dough setting.
  2. Once the dough is complete, let it rest in the breadmaker bowl until it increases in size enough to pretty much fill the bowl, same way as your loaf of bread would. I only did this because having a baby, I didn't get back to it for quite a long time after the dough was complete ;)
  3. Take out the dough and place on a floured bench. Roll out in a rectangle shape, your dough should be about a 1/2 cm in thickness.
  4. Roll out the paste, in fact the paste should be able to be spread onto your dough, but because of what I explained earlier, mine didn't work out ;), so you roll it out really really thinly and spread it out over your dough, trying to cover as much of your dough as possible. Because my "paste" didn't cover the whole of my dough, I used the 2tbs of butter and make up for it. Melt the 2tbs of butter and brush it over the dough and paste, and sprinkle with the flour.
  5. Roll up the dough the same way you would roll up a swiss roll. Then put it aside in a warm place to rise for half an hour.
  6. First roll out the pastry roll in the direction of the blue arrows. Cut the pastry in half , and roll out in the direction of the pink arrow. Cut pieces as indicated by the dotted line, and roll up your "croissants" starting from the widest part of the triangle, towards the point.
  7. Place them on a cookie sheet covered with baking paper and allow to rise in a warm place for about 15 minutes. Brush with a simple syrup and sprinkle with sugar. Bake for about 15 minutes until they're nice and golden.
  8. Enjoy with a cuppa :)
NOTE: These turned out great and they're delicious, however they are nothing like the "Corazanes" you can buy in Uruguay in a bakery. I will try making these again, and if they're better I will post the recipe.

    Thursday, 31 March 2011

    Mini muffin anyone??


    I have been trying to get some baking done for a few weeks now, but with a 2 and a half month on my hip, the spare time I have is very little. Today however, Ms Lani decided to take a few naps, and the recipe I tried out is very quick.

    For a few days now, I have wanted to make a yogurt muffin. I found a chocolate recipe online which I decided to convert to a more healthy version.

    I replaced the flour with spelt flour, the butter with coconut oil, the milk with soy and the sugar with agave nectar/syrup. This meant altering the amounts, and for a first go, I think they turned out pretty good.

    This recipe makes 48 mini muffins. They're very moist and not too sweet, so if you prefer a sweeter muffin, you may want to add more agave or reduce the amount of cocoa used. Please keep in mind that if you add more agave you will have to reduce one of the other wet ingredients.

    For these I also used mainly organic ingredients.

    Ingredients
    220gms Wholemeal Spelt Flour
    15gms gluten free baking powder
    200gms agave nectar
    30gms cocoa
    100gms coconut oil
    1 large egg
    230gms full fat yogurt (at room temperature)
    1/4 cup soy milk
    90gms chopped chocolate (I used dark Lindt)

    Method

    1. Preheat your oven to 200 degrees celcius.
    2. Oil or spray with cooking oil two mini muffin pans. This mix makes 48, so I used two 24 pans.
    3. Sift together the flour, baking powder and cocoa until well combined. Add the chopped chocolate.
    4. Melt the coconut oil with the agave nectar and soy milk. Do not boil, you want these to be just warm not hot.
    5. Mix in the egg and yogurt. These have to be at room temperature because if they are straight out from the fridge they can solidify parts of the coconut oil and you will end up with lumps.
    6. Add the wet ingredients to the dry and mix in with a flat knife or spatula. Do not beat, you just want the ingredients to be just combined and no dry mix to be left over.
    7. Spoon into pan and bake for 10-12 minutes until done.
    8. Allow to cool and eat with a nice cuppa :)


      Enjoy!!!

    Sunday, 22 August 2010

    Zucchini Tomato & Ricotta Galette

    I have been thinking about making one of these delicious pastries since I saw the photo of a galette by Smitten Kitchen last week. Unfortunately work has been crazy busy, and I only just got to try it out tonight. It is amazingly delicious!!!
    The pastry is flaky and the sour cream gives it such a wonderful taste.

    Anyway here is my version of a galette adapted from Meals at Home


    Base:
    220gms Plain flour
    120gms chilled salted butter
    65gms sour cream
    40gms fresh lemon juice
    67gms chilled water

    Filling:
    1 large zucchini sliced into 1/2cm rounds
    2 Roma tomatoes sliced into 1/2 cm rounds
    250gms ricotta cheese
    40gms grated Parmesan cheese
    60gms grated tasty cheese
    2 large eggs
    1 bunch of basil chopped
    1 tbs chopped thyme
    1 shallot minced
    Salt and Pepper to taste

    Method
    1. Place flour, butter, and sour cream in the food processor and process until it resembles coarse crumbs.
    2. Place flour mix in a bowl, pour water, and lemon juice and stir with a wooden spoon.
    3. Knead lightly on a floured surface, once it comes together wrap in glad wrap and place in the fridge to rest.
    4. Preheat oven to 200 degree Celsius.
    5. Spread the tomato and zucchini slices over paper towels. This will drain the juice that will come out of them. Pat the tops with paper towel.
    6. Mix cheeses with thyme, basil, shallot and egg. Season mix with a little salt and pepper if desired. Keep in mind that two of the cheeses already have some salt in them.
    7. Take pastry out of the fridge and roll it out to a large circle (approx 14 inches)
    8. Place on a flat baking tray lined with baking paper.
    9. Place cheese mix in the middle of the pastry, and spread out evenly leaving a 4cm edge.
    10. Start placing the tomato and zucchini on top of the cheese, each slice only slightly overlapping. Sprinkle with freshly cracked salt and pepper.
    11. Fold the leftover edge of pastry over the cheese zucchini tomato, just to make an edge that will hold in the filling. Make sure that you press this edge onto itself, I found mine was just about to let the fillings spill out.
    12. Bake for 30-40 minutes or until the egg/cheese is set.
    13. Serve warm with steamed vegetables.

    Sunday, 15 August 2010

    Raspberry Swirl Cheesecake - Gluten Free

    This recipe was adapted from a recipe published in the Master Chef magazine. I just found the recipe online, and it turns out that the recipe originally came from the Lindt website. Anyhoo, here's the original recipe and my version :D


    Base
    200g gluten free shortbread biscuits
    50g Dessicated Coconut
    100g cream cheese


    For the cheesecake
    500g cream cheese
    150g sour cream
    120g sugar
    1 lemon, zest only
    2 eggs
    1 egg yolk
    2 tbsp corn flour
    150g Fresh or frozen raspberries

    BASE
    1. Grease and line a 20cm square pan.
    2. Place biscuits in the food processor and process until you get a fine crumb.
    3. Add cream cheese, and coconut, and process until thoroughly combined.
    4. Press mix into the pan, and place in the fridge until the rest of the cake is ready.
    CHEESECAKE
    1. Place cream cheese and sour cream in food processor. Process until smooth.
    2. Add egg, cornflour, sugar, and lemon rind. Process thoroughly.
    3. Remove about half of the mix from the food processor and set aside.
    4. Add 50 gms of the raspberries and process thoroughly.
    5. Pour the raspberry cheesecake mix into the pre-prepared pan, then pour the one without raspberry over it. Using a skewer, make a swirl pattern.
    6. Decorate the top of the cheesecake with the leftover raspberries.
    7. Bake in a water bath at 150 degrees Celsius for an hour and 10 minutes.
    8. Chill before serving.

    Sunday, 25 July 2010

    Pasteles Hojaldrados, made for my dad who loves them

    My grandmother used to make these for my dad's birthday when we lived in Uruguay. After we came to Australia, my aunty (dad's sister) made them a few times and then mum and dad got into the habit of making them for pretty much every birthday. But for many many years, no one has made these. I think it's simply because they take such a long time. (As I had suspected and discovered today)

    I got bitten by the cooking bug once again, and went on a search for a recipe for these. I have never made them before, so this was a total experiment.

    I found this recipe by a Uruguayan guy, which I've adapted for vegetarians. The original recipe is made with lard (beef lard) eeek!!! Still they're yum :D

    http://gcastrop.blogspot.com/2008/08/receta-del-mes-pasteles-hojaldrados-de.html
    The recipe goes like this

    Ingredients
    500gms of plain flour
    250mls of hot water
    80gms of butter
    1 tbs of salt (I use rock salt, and thought it was too much but did it anyway, cause that's what the recipe said, the pastry was quite salty, but it works in the end, go figure!!!)
    1tsp of sugar
    Dulce de leche or Quince paste (Or both if you want to try making half and half)
    120gms of cornflour
    60gms of butter (softened)
    1 litre of Rice Bran oil
    Caster sugar for sprinkling the pasteles :)

    Method
    1. In a small bowl, mix the hot water, sugar, salt and 80gms of butter. Mix until melted and combined.
    2. Place flour in a bowl, make a well in the center and pour the contents from above in, to make a soft dough.
    3. Knead the dough until it is pliable.
    4. Roll out the dough into a rectangle, 5mm in thickness.
    5. Spread about 1/6th of the butter (60gms) over half of the rolled out pastry, sprinkle with corn flour, and fold the unbuttered piece over the buttered piece, press together lightly and roll out into a rectangle again. Repeat at least 6 times. (I did mine 7 times)
    6. Cover the pastry with glad wrap and set aside to rest for 40 minutes.
    7. Roll out the pastry to about 3mm in thickness, and cut into 8cm squares.
    8. Place some quince paste in the middle of each square, moisten the area just around the filling, and press the pastry together, making sure that you don't seal the edges, you just want to seal the pastry around the filling.
    9. If you're filling with two different fillings, i would recommend, as i did, that you fold them differently so you know which ones are which. :D
    10. Fry in hot rice bran oil, making sure that you turn them over, the tend to cook well where the filling weighs them down, so you need to push them into the oil so all sides are cooked well.
    11. Drain in kitchen paper, and sprinkle with caster sugar.
    12. Do not throw out the cut offs, cut them into strips, fry them and sprinkle with caster sugar, they make a beautiful crunchy snack.
    13. Best eaten cold with a nice hot chocolate. BEWARE YOUR HEART!!!! hahahahahaha

    Tuesday, 20 July 2010

    Sweet Potato Pie - Yeah it's looking like pie week!!!


    This pie was inspired by a pumpkin pie recipe I saw last week on Better Home and Gardens and a roasted sweet potato that a work colleague makes.

    The pumpkin pie on the telly was made with skim milk, and low fat pastry. None of that here ;)

    The roasted sweet potato is mashed with five spice and a strong tasting cheese. Hmmmm yum!!!

    I kind of combined these two ideas to make this pie.
    Once again, I used the puff pastry from Aldi.


    Ingredients

    600gms boiled sweet potato
    50gms grated Parmesan
    1 quarter (to half) of a freshly grated nutmeg
    1 sheet of puff pastry
    3 eggs
    Salt & Pepper to taste

    Method
    1. Pre heat oven to 180 degrees Celsius.
    2. Line a gratin dish with baking paper on the bottom and grease the sides.
    3. Line dish with sheet of puff pastry, cutting off excess.
    4. Mash sweet potato, and mix with cheese, nutmeg, parmesan and salt and pepper.
    5. Mix in eggs, then pour onto puff pastry.
    6. Bake in oven for 30-40 minutes.
    7. Serve with salad.

    Sunday, 18 July 2010

    Pascualina - Spinach Pie


    Pascualina is a spinach pie which we often eat in Uruguay. It is made with spinach or silver beet, sauteed onions and a home made pastry. I cheated because I love puff pastry, so I used a bought one. I have found the puff pastry from Aldi to be the best out there. I have tried many brands and the Aldi brand really kicks the backside of any of the more well known puff pastries out there. Well that's my opinion anyway.

    I also use the Aldi frozen spinach. The reason I like it is because it is really easy to defrost as it comes in 6 pieces, and it is dry. Whenever I have defrosted other brands of spinach, I find that there is a huge amount of water, so you can never just add it to the dish frozen because you need to drain it first. The spinach from Aldi, doesn't have to be drained. It's perfect :)

    Ingredients
    3 onions chopped finely
    1kg frozen spinach (defrosted)
    1/2 nutmeg freshly grated
    250gms Philadelphia cream cheese
    6 eggs
    4 sheets frozen puff pastry
    Olive oil
    salt and pepper to taste
    Egg wash

    1. Pre-heat oven to 190 degrees celcius.
    2. Sautee onions until golden.
    3. Add spinach, cream cheese, nutmeg and salt and pepper to taste. Stir through until all ingredients are mixed together. Put aside to cool slightly.
    4. Line a rectangular tray with puff pastry ensuring the pastry reaches right up to the edge of the tray.
    5. Spread out the filling over the puff pastry, and with a spoon make 6 holes in the filling so you can pour in the whole eggs. Crack eggs one by one and pour into the holes.
    6. Cover the pie with more pastry sealing the edges.
    7. Brush pastry all over with egg wash and bake in a hot oven for 40 minutes until pastry is golden.
    8. Serve with roasted sweet potato and steamed green beans.
    Serves 6-8

    Thursday, 20 May 2010

    Croquetas


    150gms arborio rice
    300gms cold water
    1/2 a vegetable stock cube
    20gms fresh chopped parsley
    20gms grated parmesan
    1 small onion finely chopped
    140gms rice milk
    10gms pure cornflour
    1/2 cup gluten free savoury biscuits (processed to a fine crumb)

    1. Place rice, stock cube and water in a microwave proof bowl.
    2. Set on high for 10 minutes. Stop after 8 minutes and stir thoroughly.
    3. Finish cooking and set aside.
    4. Saute onion in a non stick pan until caramelised, turn off heat and add parsley, stir to wilt parsley.
    5. Add rice, combine and set aside.
    6. In a microwave safe bowl, place milk, cornflour and cheese. Cook on high for one minute, take out and stir. Cook for a further minute. At this time the sauce should be thick.
    7. Pour sauce over the rice mix and combine. Set aside to cool.
    8. Form rice mix into balls and roll in crumbs.
    9. Deep fry until golden brown and serve with salad.

    Wednesday, 21 April 2010

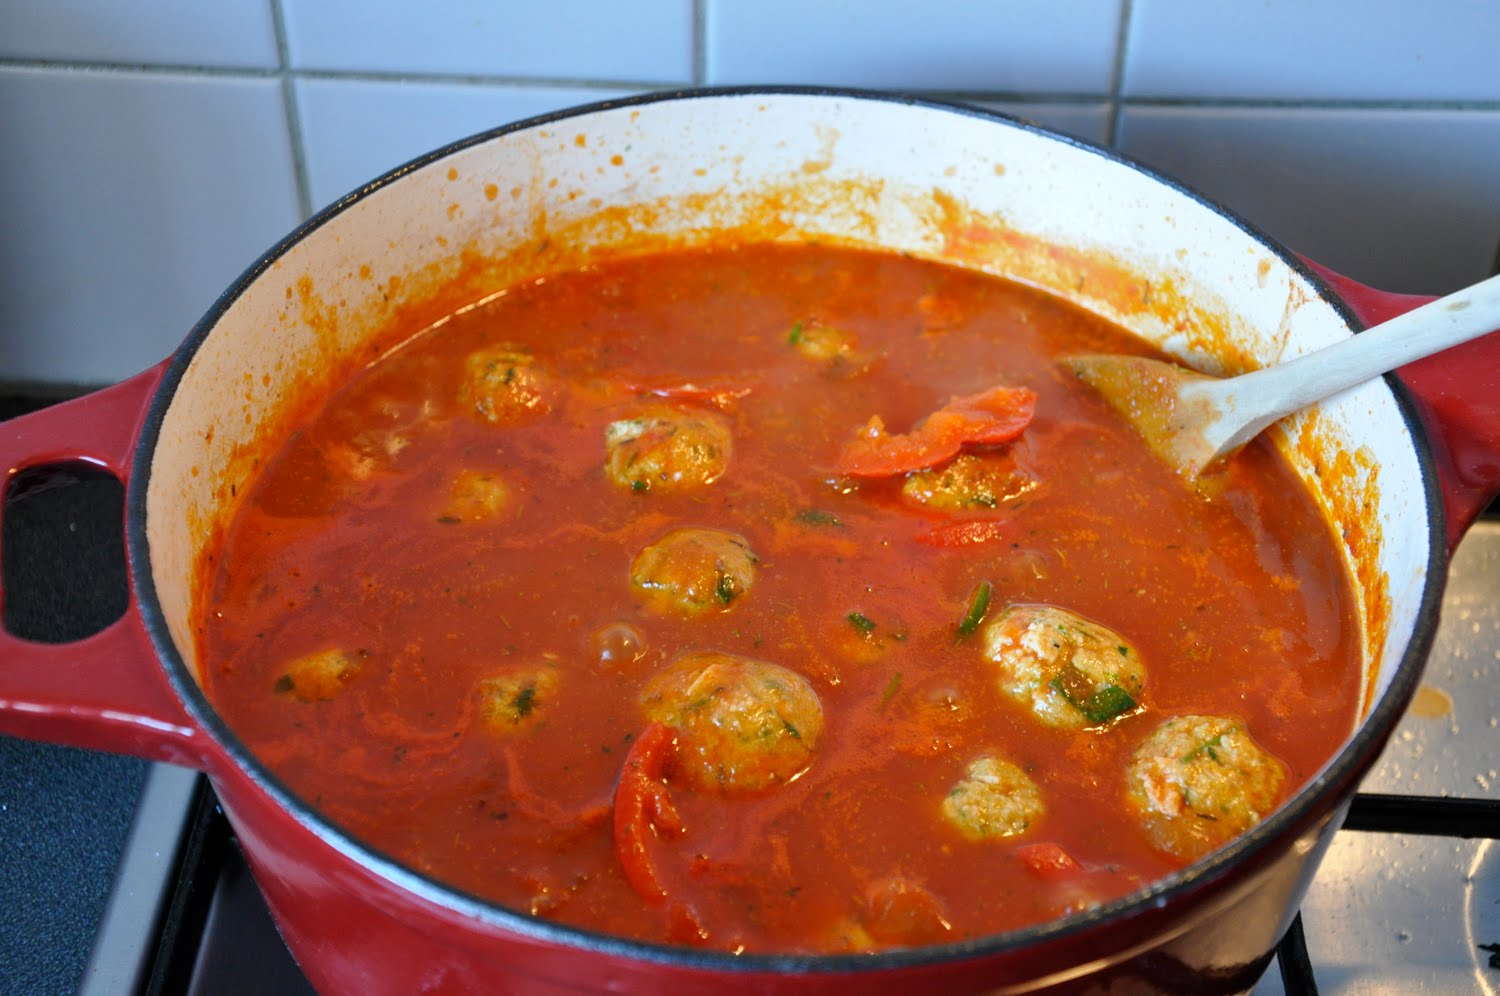
    Albóndigas Vegetarianas - Vegetarian "Meatballs"

    I was watching MasterChef yesterday and thinking that there aren't many vegetarian dishes on the show. I was contemplating how I would survive on a show such as that one, and realised that I probably couldn't survive on it very long.

    There was one vegetarian girl on the show last year and she was quickly outed. From what I've seen there are no vegetarians on the show at all this year.

    Anyway so I got to thinking about vegetarian cooking in general and all these ingredients came into mind and I decided to make these.

    Ingredients (Serves 4-6)
    500gms firm tofu (I used Pureland Organic Tofu)
    1 small bunch of chives
    1/4 cup chopped parsley
    100gms fresh shitake mushrooms
    3 tablespoons of potato flour
    1 clove of garlic (minced)
    1 egg
    salt to taste
    Olive Oil

    For the sauce
    1 750ml Provista Sugo Classica
    2 medium onions sliced
    4 baby red capsicums sliced
    1 tbs dried thyme
    1 medium green chili sliced
    3 bay leaves
    2 cups of water
    salt to taste
    Parmesan cheese to serve.

    To make the albondigas
    1. Saute mushrooms in olive oil, then set aside to cool.
    2. Chop half of the tofu and set aside. Put the other half in the food processor.
    3. Add chopped chives, garlic, parsley, egg, flour and salt. Process to a paste.
    4. Add mushrooms and process, make sure that mushrooms are still in pieces.
    5. Add chopped tofu and process, leaving chunks of tofu.
    6. Form into balls and set aside.

    To make the sauce

    1. Saute onion and capsicums in a heavy pan until collapsed.
    2. Add sugo and water and simmer for 5 minutes.
    3. Add salt to taste, chopped chili, bay leaves and thyme.
    4. Slowly and carefully add the albondigas into the sauce (do no stir).
    5. Simmer covered for 20 minutes, serve with brown rice and sprinkle with chopped parsley or Parmesan cheese.


    Friday, 2 April 2010

    Alfajores de Maizena (Gluten Free)


    Alfajores de Maizena are small soft shortbread type cookies which are joined together with "dulce de leche" (thick caramel). Their sides are covered in dessicated coconut.
    These are a favourite snack in Uruguay, Argentina & Chile. Some of the ones you can buy ready made, are covered in chocolate. The ones made in Chile have a much harder cookie, but are still assembled the same way.
    Maizena is cornflour, and the main ingredient in this recipe.

    I just love these!!
    I saw some at my mum's yesterday but because of their wheat content I was not able to eat them. They have a small amount of wheat flour in them.
    So I went shopping and bought 100% corn cornflour, I found a recipe which I converted into gluten free by replacing the wheat flour with rice flour and potato flour. I also replaced the cognac and lemon rind.
    Now I can eat these to my heat's content (although in reality my heart would be much happier if I were eating broccoli instead!!)

    Ingredients
    200gms low salt margarine (you can use softened unsalted butter)
    150gms caster sugar (superfine sugar)
    3 egg yolks
    300gms pure cornflour
    125gms rice flour
    75gms potato flour
    2tsp gluten free baking powder
    1tsp vanilla extract
    1tsp lemon extract

    To assemble
    200gms dulce de leche (Nestle Top'n'Fill works really well)
    80gms dessicated coconut

    METHOD
    1. Preheat oven to 165 degrees celcius (fan forced)
    2. Sift flours and baking powder together, set aside.
    3. Cream margarine, sugar, extracts and yolks with an electric mixer until light and fluffy.
    4. Fold in dry ingredients until it all comes together.
    5. Place dough on a large piece of baking paper, and knead lightly.
    6. Roll dough out to about 1/2 a cm between two pieces of baking paper.
    7. Remove top sheet of baking paper, and cut with a round cutter.
    8. Place on a cookie sheet at least 2 cms apart from eachother, and bake for 15 minutes.
    9. Allow to cool on a cooling rack.
    10. Place enough caramel on the bottom of a cookie to cover it, and gently press another cookie to it so that some caramel comes out of the sides.
    11. Spread the squeezed out caramel all over the sides of the cookies, and then roll that part through the dessicated coconut.
    12. Eat accompanied with a cup of tea or coffee. YUM!!!